Follow Me On Social Media!
Oreo Pie: The Irresistibly Creamy Dessert You Need Today
Introduction to Oreo Pie
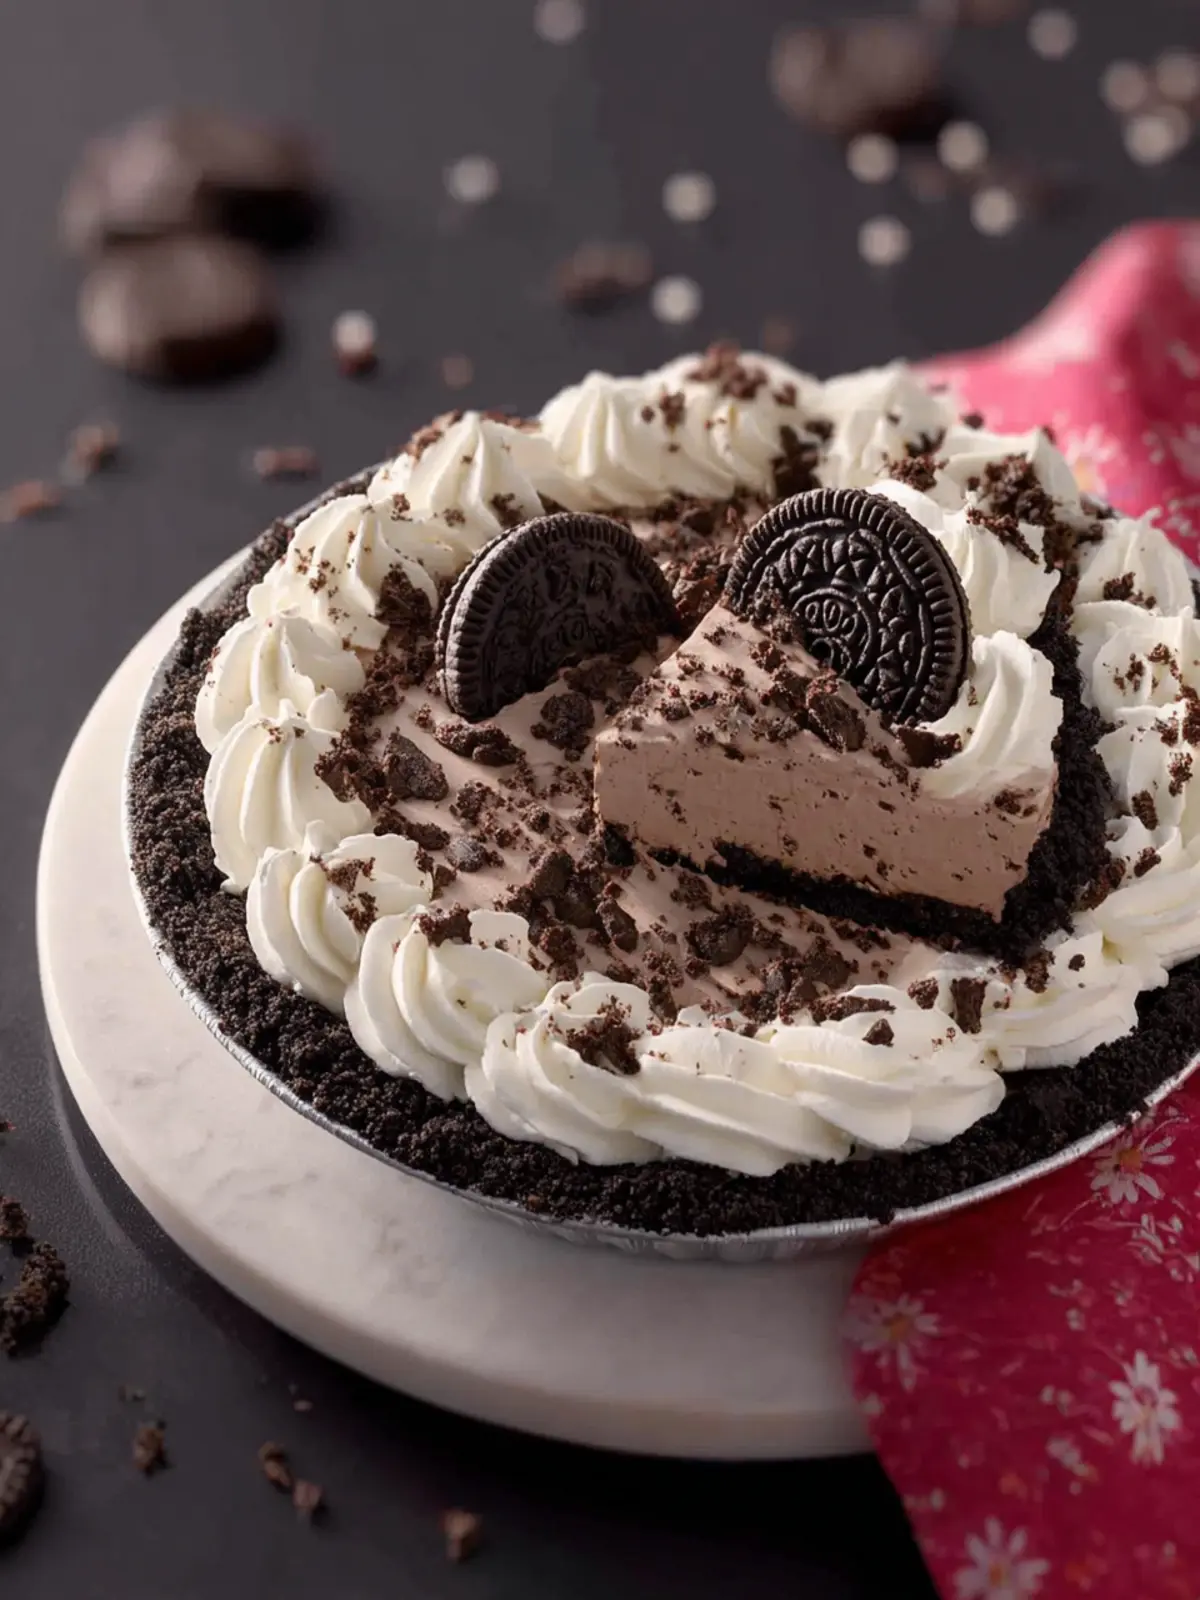
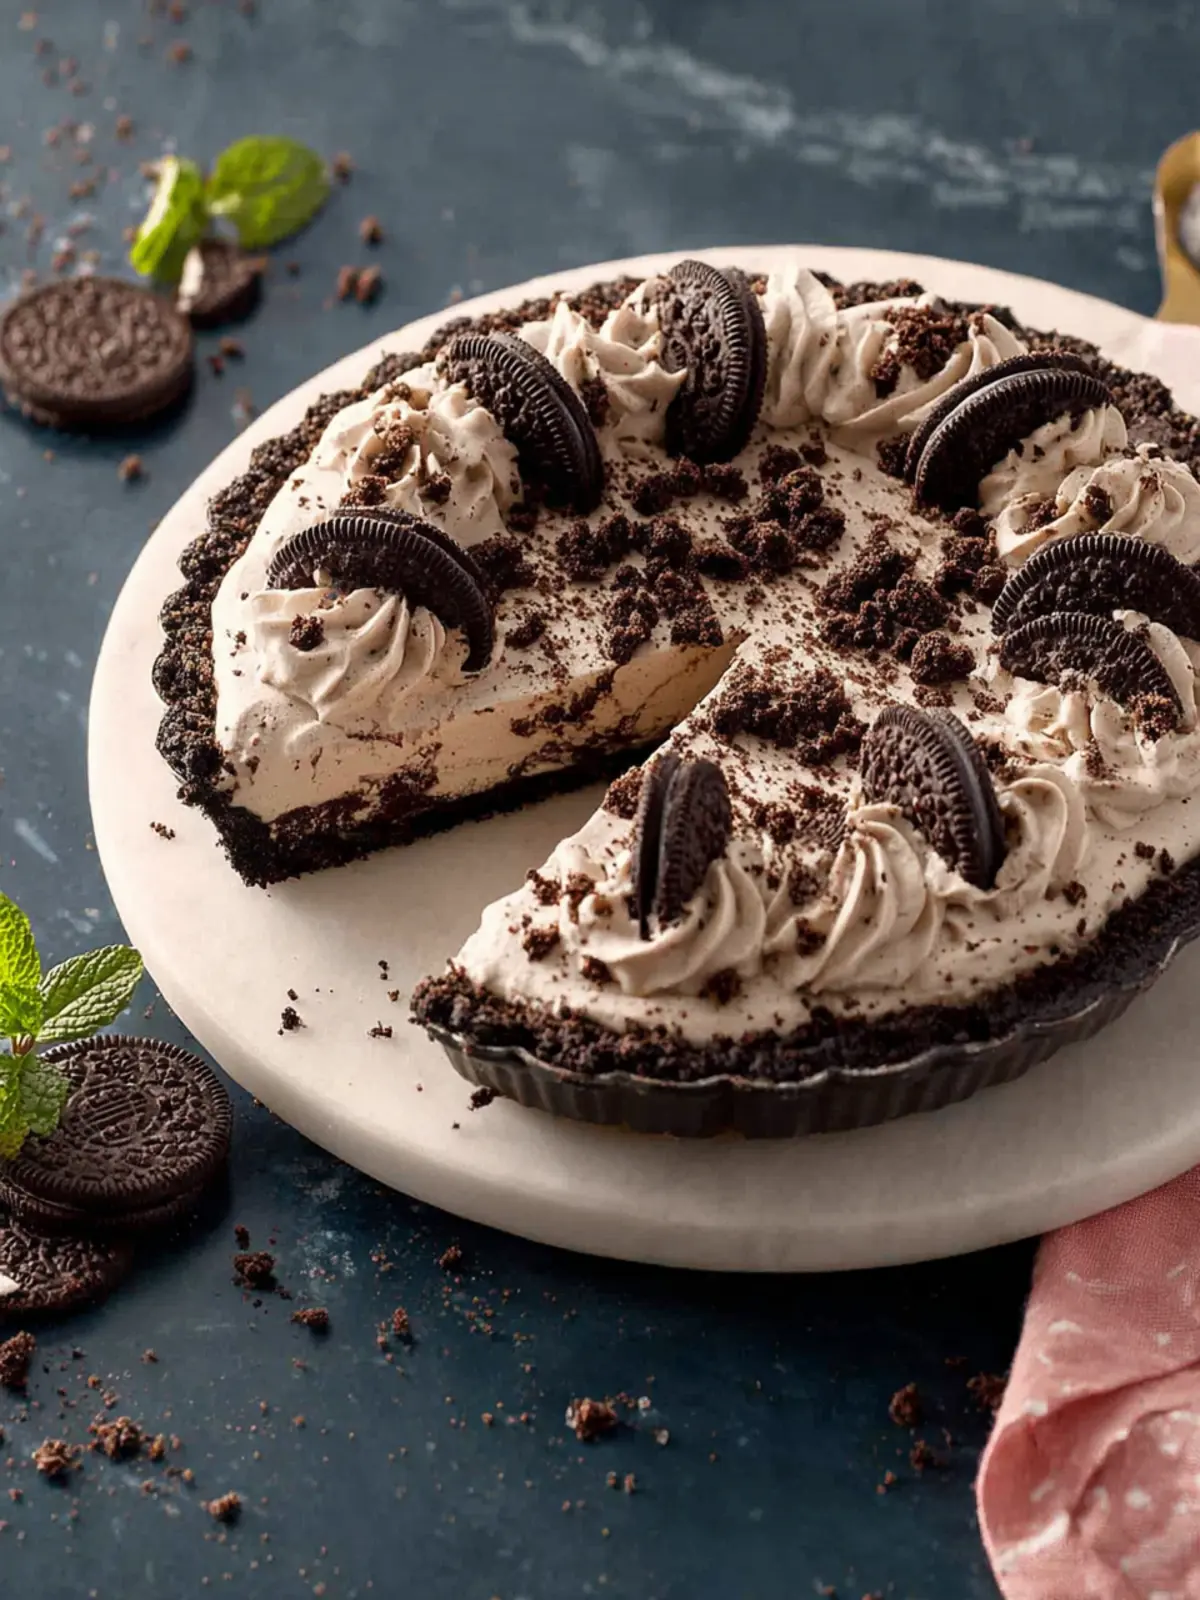
There’s something utterly delightful about preparing your own Oreo Pie at home, where each bite transports you back to the nostalgic days of cookies and milk. Picture this: a creamy, rich filling encased in a crunchy Oreo crust, with layers that melt in your mouth. This pie blends simplicity with indulgence, resulting in a dessert that feels both classic and luxurious.
The joy of homemade treats
Creating an Oreo Pie is more than just following a recipe; it’s an experience that brings joy from start to finish. The process of crushing Oreos, mixing them with creamy fillings, and letting the pie chill in the fridge fills your kitchen with a delectable aroma that’s hard to resist. You might be surprised to discover how straightforward the preparation is, making it a perfect project for novice bakers or anyone looking to impress friends at a dinner party.
Using quality ingredients can elevate your pie even further. For the crust, I often recommend using whole Oreos for their distinct flavor, and you can easily swap in gluten-free options if needed. The creamy filling is typically a blend of whipped cream and cream cheese, creating that luscious texture that pairs perfectly with the crunchy crust. As you layer it all together, anticipate the smiles on everyone’s faces when they take their first bite.
The beauty of making an Oreo Pie at home lies in its versatility. Want to add a twist? Try incorporating peanut butter, or perhaps a layer of chocolate ganache? You can customize it to match the tastes of your guests, making every slice a little piece of your personality. Plus, there’s a certain satisfaction in presenting a dessert you’ve crafted from scratch; it’s a conversation starter and a delightful centerpiece at any gathering.
So roll up your sleeves and get ready to dive into this recipe for Oreo Pie. With each layer, you’re not just making a dessert; you’re crafting a memorable experience for you and your loved ones. Let’s get started!
Key Ingredients for Oreo Pie
Creating a mouthwatering Oreo Pie is all about using the right ingredients that blend seamlessly together. Each component plays a vital role, ensuring that every bite is a delightful experience.
-
Oreo Cookies: The star of the show! I use regular Oreos for the crust and as a delightful mix-in. Their chocolatey crunch adds an irresistible texture that complements the creamy filling beautifully.
-
Butter: A classic ingredient for binding the crust. Melted butter mingles with crushed Oreos, creating a rich and cohesive base that holds everything together. Don’t skip this step, as it’s essential for achieving that perfect crust.
-
Cream Cheese: For an irresistible creamy filling, I prefer using block cream cheese, which adds richness and a slight tang. Make sure it’s softened to room temperature for easier blending.
-
Whipped Topping: This lightens the filling, giving it a fluffy texture. I usually use store-bought whipped topping, but you can make your own for a fresher taste.
-
Powdered Sugar: Just a bit sweetens the filling and helps stabilize it, ensuring your Oreo Pie holds its shape when served.
With these key ingredients, you’re well on your way to creating a deliciously indulgent Oreo Pie that will impress friends and family alike!
Why You’ll Love This Oreo Pie
Imagine a dessert where each decadent slice transports you straight to cookie heaven: that’s exactly what you get with this irresistible Oreo Pie. The blend of crunchy cookie crust and rich, creamy filling comes together to create a perfect balance of textures and flavors that leaves you craving more.
Delight in Every Bite
The moment you take your first bite of this Oreo Pie, you’ll experience the familiar nostalgic taste of those beloved cookies. It’s a flavor that’s hard to replicate, making this pie not just a dessert, but a delightful trip down memory lane. What could be better than satisfying your sweet tooth with a treat that’s both familiar and comforting?
Perfect for Any Occasion
Whether it’s a birthday celebration, a cozy family dinner, or simply a personal indulgence, this pie is versatile enough to shine at any gathering. It’s always a hit, sparking joy and conversation as friends and family dive into the rich, delectable layers.
Easy to Make
Not only is this Oreo Pie delicious, but it’s also incredibly simple to prepare. With just a handful of ingredients and straightforward steps, you’ll have a stunning dessert that looks and tastes like it came from a bakery—without any of the fuss. In just a few easy steps, you can impress your loved ones with a flavorful creation that’s as delightful to make as it is to eat.
Embrace the joy of baking and create this Oreo Pie that everyone will love!
Variations of Oreo Pie
Oreo Pie isn’t just a one-trick wonder; it’s a canvas of delicious possibilities! Once you master the classic version, the door opens to a delightful array of variations that can cater to different tastes and occasions.
Minty Oreo Twist
For those who adore mint, consider adding a dash of peppermint extract to the filling. You can even crumble Mint Oreo cookies into the crust for an extra burst of flavor. Top your pie with whipped cream and a sprinkle of crushed mints for a refreshing touch.
Peanut Butter Indulgence
If you’re a peanut butter lover, this variation will make you swoon! Fold smooth peanut butter into your filling for a creamy, nutty flavor. For an added crunch, sprinkle chopped peanuts on top, or drizzles of melted chocolate for that perfect balance.
Cookie Dough Delight
Imagine biting into a slice of Oreo Pie and finding velvety chunks of cookie dough! Just prepare your favorite edible cookie dough recipe and mix it into the filling before chilling. This twist not only adds texture but also elevates the indulgence level!
Seasonal Sensation
Transform your Oreo Pie for the holidays! In fall, consider adding pumpkin puree and warm spices for a pumpkin spice variation. During winter, a dash of cinnamon can create a cozy holiday vibe.
With these variations, your Oreo Pie can be as unique as your taste buds. The possibilities are endless, so don’t hesitate to experiment and create your very own signature version!
Cooking Tips and Notes for Making Oreo Pie
Creating an irresistible Oreo Pie can be an exciting culinary adventure. With a few tips, you’ll elevate this delightful dessert from good to extraordinary!
Choose the Right Oreos
Whether you prefer classic or double-stuffed Oreos, your choice will impact the crust and filling texture. Double-stuffed cookies offer a creamier filling, while the classic provides a more balanced flavor.
Perfect Crust Technique
For a perfectly crunchy crust, crush the Oreos into fine crumbs. A food processor makes this task effortless, but you can also use a zip-top bag and a rolling pin if you prefer. Mix the crumbs with melted butter to create a binding agent that keeps your crust together.
Chill for Success
Chilling the pie is critical. Allow it to set in the refrigerator for at least four hours (or overnight) to let those flavors meld together beautifully. This waiting period also ensures that the pie slices maintain their shape when you serve them.
Add Toppings for Texture
Get creative with toppings! Whipped cream, chocolate drizzle, or even extra cookie crumbles can enhance your Oreo Pie. These add not just flavor, but a delightful visual appeal as well.
With these tips, you’re all set to create a show-stopping Oreo Pie that will impress your friends and family. Enjoy baking!
Serving Suggestions for Oreo Pie
The delightful Oreo Pie isn’t just a dessert; it’s a centerpiece for any gathering. Imagine hosting friends for a movie night or a birthday bash—this pie will steal the show! Here are some tasty ways to serve it.
Perfect Pairings
- Whipped Cream: A generous dollop of fresh whipped cream balances the richness of the pie and adds a lovely lightness.
- Chocolate Sauce: Drizzling warm chocolate sauce over a slice of Oreo Pie amplifies its flavor, making each bite even more indulgent.
- Ice Cream: Consider serving your pie with a scoop of vanilla or cookies-and-cream ice cream for a delightful contrast in textures.
Creative Serve-Out Options
- Mini Pie Slices: Cut your pie into smaller, bite-sized pieces for sharing at parties. They make perfect finger foods!
- Pie in a Jar: Layer crumbles of the Oreo Pie in jars for an easy, portable dessert option that’s sure to impress.
Each of these options invites guests to customize their servings, making your Oreo Pie an even more memorable treat!
Time Breakdown for Making Oreo Pie
Crafting an Oreo Pie is not just about satisfying a sweet craving; it’s an inviting ritual that can make any gathering feel special. Understanding the time commitment involved can ensure a smooth baking experience with delicious results.
Preparation time
Getting started on your Oreo Pie takes about 15 minutes. This includes gathering the ingredients, crushing the cookies, and mixing your creamy filling.
Freezing time
Once you’ve assembled your pie, it needs to chill in the freezer for at least 4 hours. This step is crucial for achieving that perfect, firm texture that makes each slice so delightful.
Total time
In total, you’re looking at approximately 4 hours and 15 minutes from start to finish. With a little patience during the freezing phase, you’ll soon have a stunning Oreo Pie ready to impress your friends and family!
Nutritional Facts for Oreo Pie
When you dive into a slice of Oreo Pie, it’s not just about indulgence; it’s a delightful exploration of flavors and textures. As you savor each bite, it’s good to have an idea of what you’re enjoying nutritionally.
Calories
A typical serving of Oreo Pie contains around 350 calories. This dessert packs a punch with its rich ingredients, leading to a satisfying slice that feels indulgent without being overly heavy.
Protein
Surprisingly, Oreo Pie offers about 4 grams of protein per slice. This doesn’t make it a protein powerhouse, but it’s enough to give you a little boost alongside your sweet enjoyment.
Sugar
With approximately 30 grams of sugar in each slice, Oreo Pie certainly caters to those with a sweet tooth. The balance of sweetness complements the decadent chocolate flavors and creamy filling, making it a favorite for dessert lovers.
Keep these nutritional facts in mind as you enjoy your Oreo Pie, and remember that every slice is a moment to savor!
FAQ about Oreo Pie
Understanding the nuances of making a delicious Oreo Pie can elevate your baking game and delight your taste buds. Below are some common questions that might help ensure your pie turns out perfectly every time.
How can I make Oreo Pie ahead of time?
Making Oreo Pie in advance not only saves you time but also allows the flavors to meld beautifully. You can prepare the pie up to one day ahead of serving. Simply follow the recipe as directed and refrigerate it after assembling. The pie will firm up in the fridge, making it easier to slice when it’s time to serve.
Can I use sugar substitutes in this recipe?
Absolutely! If you’re looking to reduce sugar intake, feel free to swap out sugar for your favorite sugar substitutes. Stevia, erythritol, or any granulated sugar alternative can work well in the filling for the Oreo Pie. Just keep in mind that the texture might vary slightly, so choose a substitute that measures like sugar for best results.
What other cookies can I use for the crust?
While Oreos are a classic choice, you can get creative with your crust! Try using other sandwich cookies like chocolate mint, peanut butter, or even vanilla wafers. Just crush them as you would Oreos, and you’ll have a deliciously different twist on your Oreo Pie crust.
How should I store leftover Oreo Pie?
If you have any leftovers (though they might disappear quickly!), store them in an airtight container in the refrigerator. This will keep your Oreo Pie fresh for up to three days. Just remember to enjoy it chilled for the best taste!
Conclusion on Oreo Pie
In the delightful world of dessert, Oreo Pie stands out as a heavenly treat that combines simplicity and indulgence perfectly. Whether you’re hosting a gathering or simply satisfying a late-night craving, this pie delivers. Its creamy filling and crunchy crust create a heavenly balance that’s irresistibly delicious. Don’t forget to slice it up and share; after all, good desserts are meant to be enjoyed together. As you whip up this recipe, take a moment to savor the joy that comes not just from the pie itself, but also from the memories created along the way. Happy baking!
Print
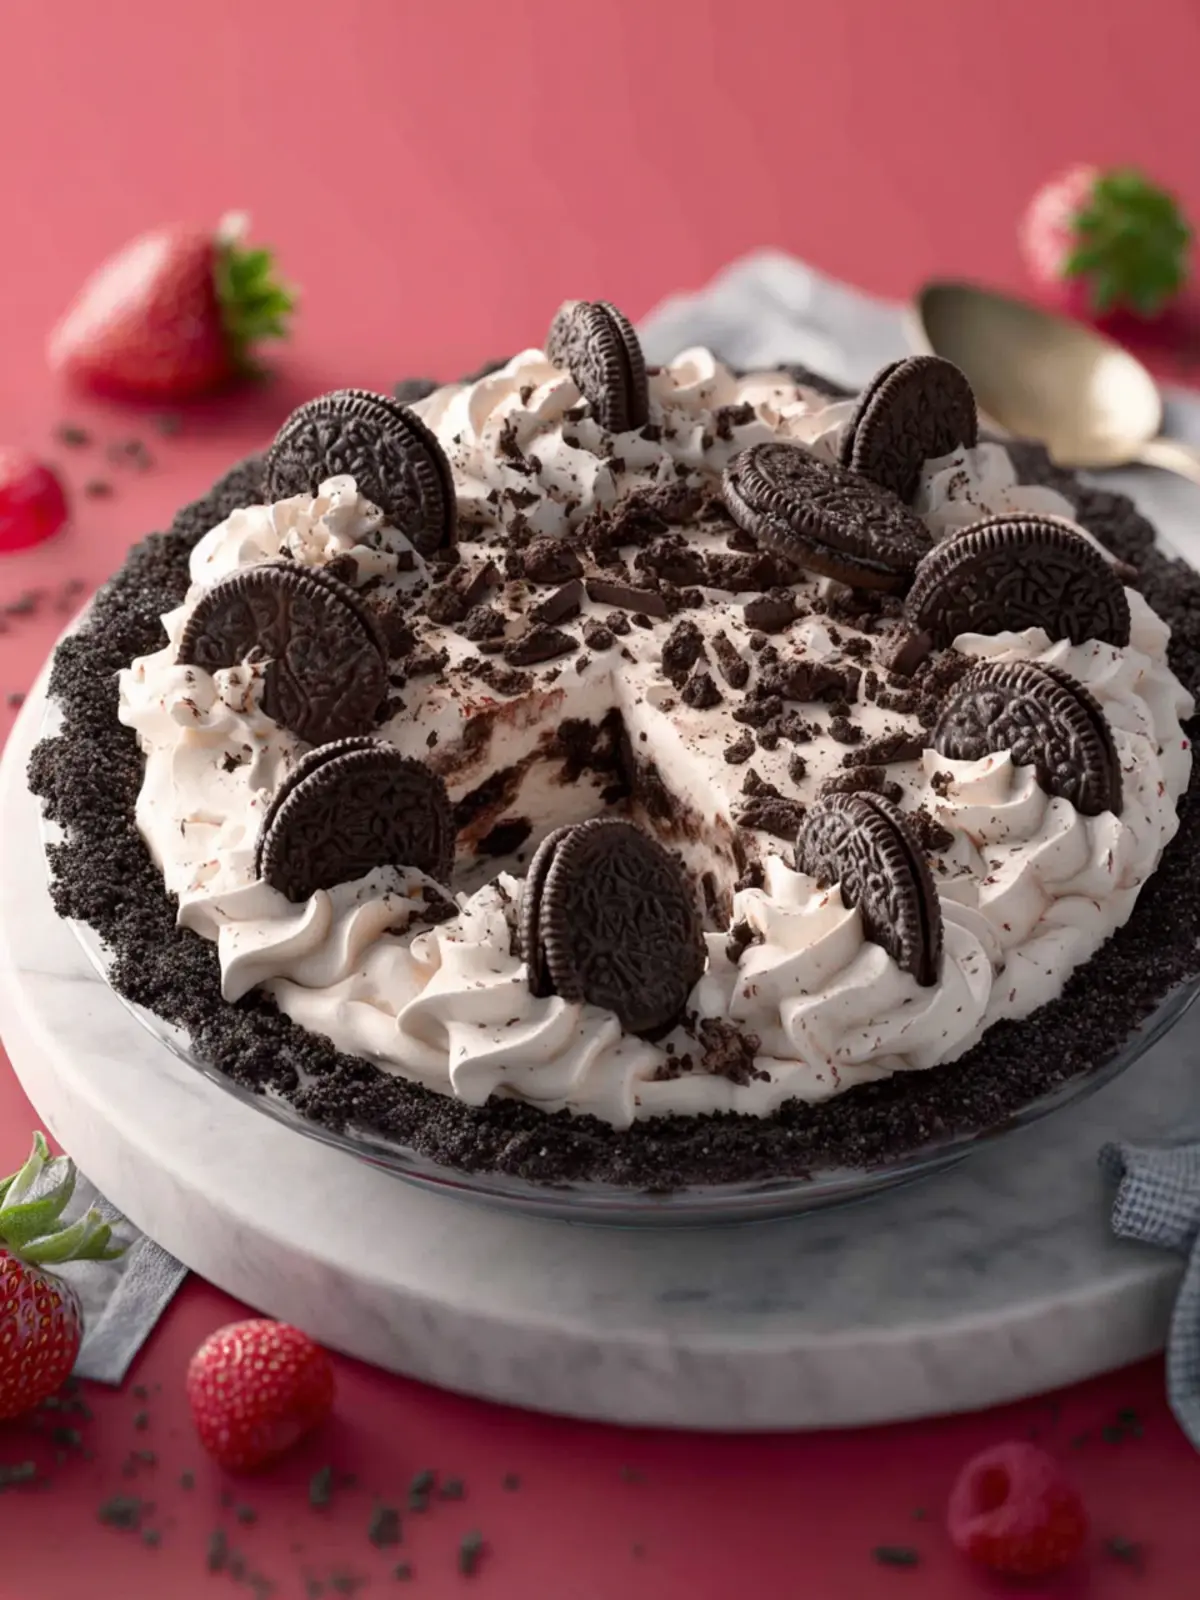
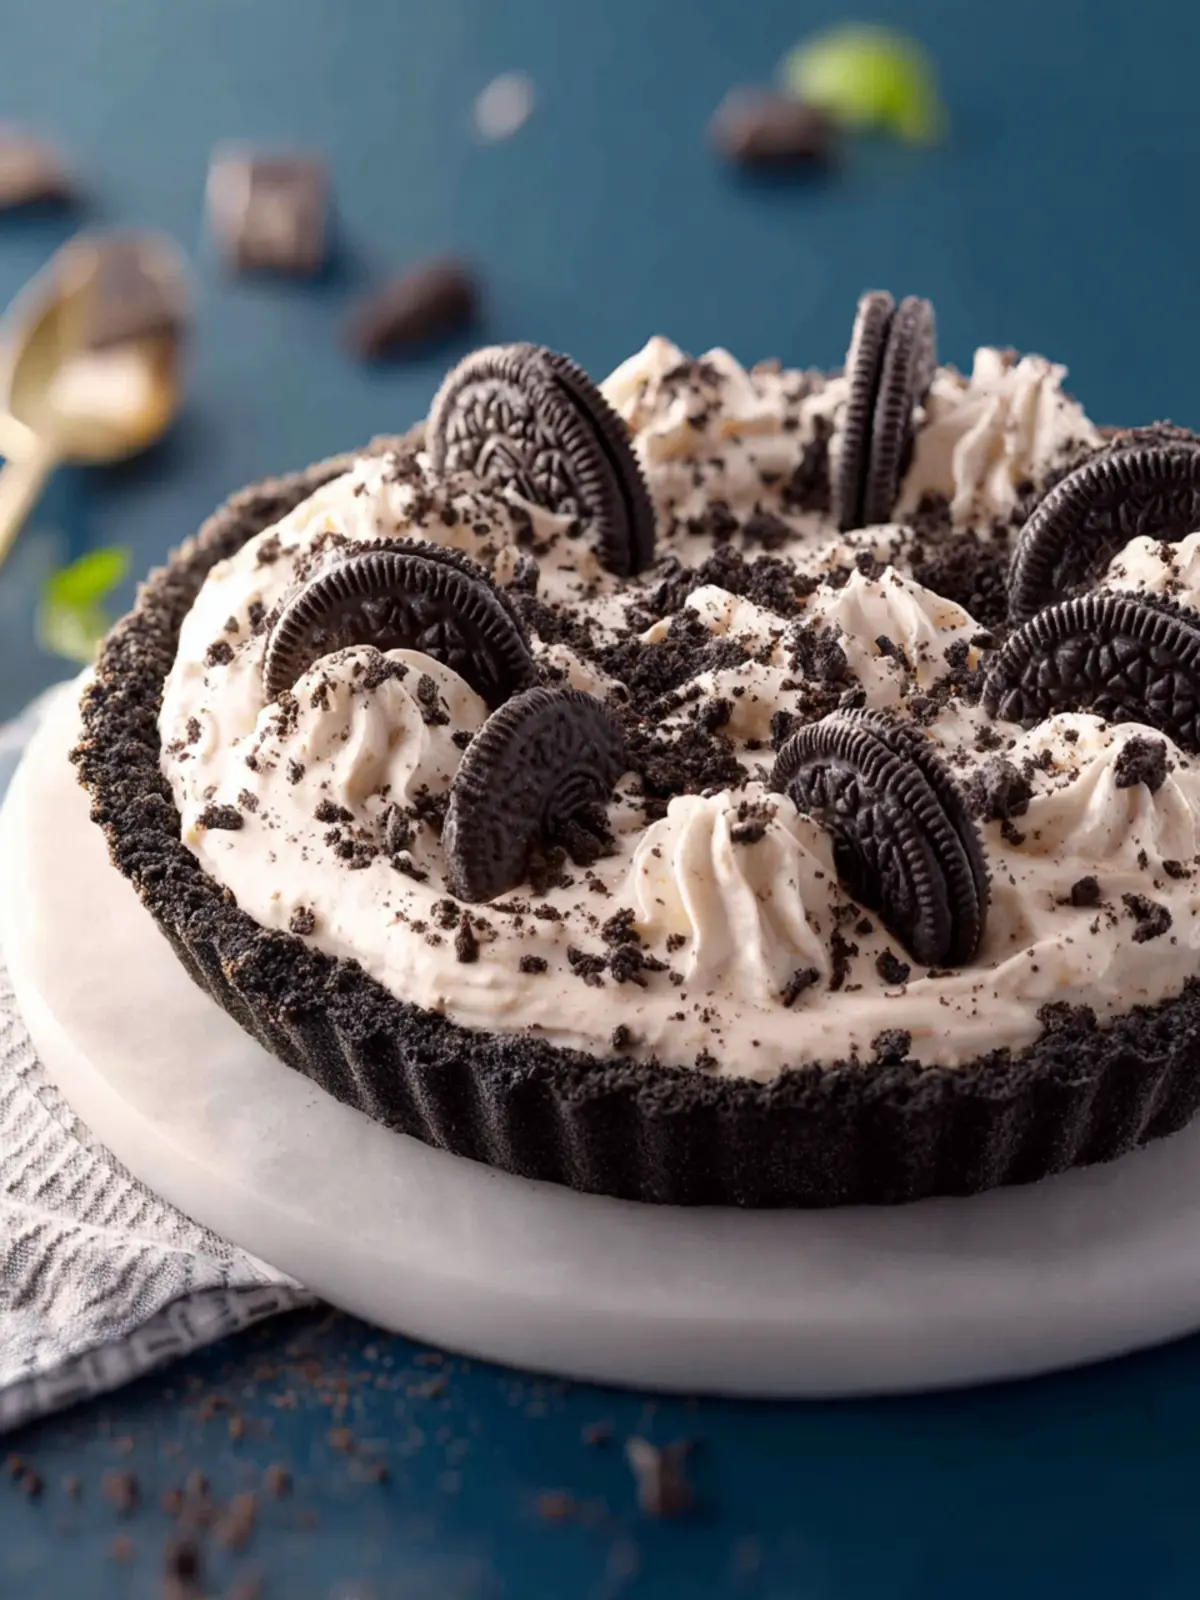
Oreo Cream Cheese Pie
- Total Time: 6 hours 30 minutes
- Yield: 8 servings 1x
- Diet: Vegetarian
Description
A delicious no-bake Oreo cream cheese pie that is perfect for any occasion.
Ingredients
Scale
- 24 Oreos (275g)
- ¼ cup unsalted butter (melted) (56g)
- 1 cup heavy whipping cream (240mL)
- 1 (8-ounce/226g) block cream cheese (room temperature)
- ¾ cup confectioners’ sugar (90g)
- 1½ teaspoons vanilla extract
- 20 Oreos (chopped, plus more for garnish (230g))
- Whipped cream (for serving)
Instructions
- Lightly spray a 9-inch pie pan with cooking spray.
- In the bowl of a food processor, process the Oreos until finely ground, about 30-45 seconds. Place in a medium bowl, and stir in the melted butter until well combined. Press the mixture into the bottom and sides of the pie pan. Freeze while preparing filling, or at least 30 minutes and up to 3 days.
- In a large bowl using a handheld electric mixer, beat the cream on medium-high speed until stiff peaks form, about 2 minutes.
- In another large bowl, beat the cream cheese on medium-high speed until smooth and fluffy, about 2 minutes. (No need to clean beaters between the cream and cream cheese.) Add the confectioners’ sugar and vanilla, beating until smooth, about 1 minute.
- Gently fold in the whipped cream and chopped Oreos until combined. Spoon the filling into the frozen crust, spreading it into an even layer. Loosely cover and refrigerate until set, at least 6 hours or up to 2 days.
- When ready to serve, top with additional whipped cream and Oreos, if desired.
Notes
- Can be made up to 3 days in advance and stored in the freezer.
- For a decorative touch, garnish with additional Oreo crumbles on top.
- Prep Time: 30 minutes
- Cook Time: 0 minutes
- Category: Dessert
- Method: No-bake
- Cuisine: American
Nutrition
- Serving Size: 1 slice
- Calories: 350
- Sugar: 25g
- Sodium: 250mg
- Fat: 24g
- Saturated Fat: 14g
- Unsaturated Fat: 10g
- Trans Fat: 0g
- Carbohydrates: 30g
- Fiber: 2g
- Protein: 4g
- Cholesterol: 50mg