Follow Me On Social Media!
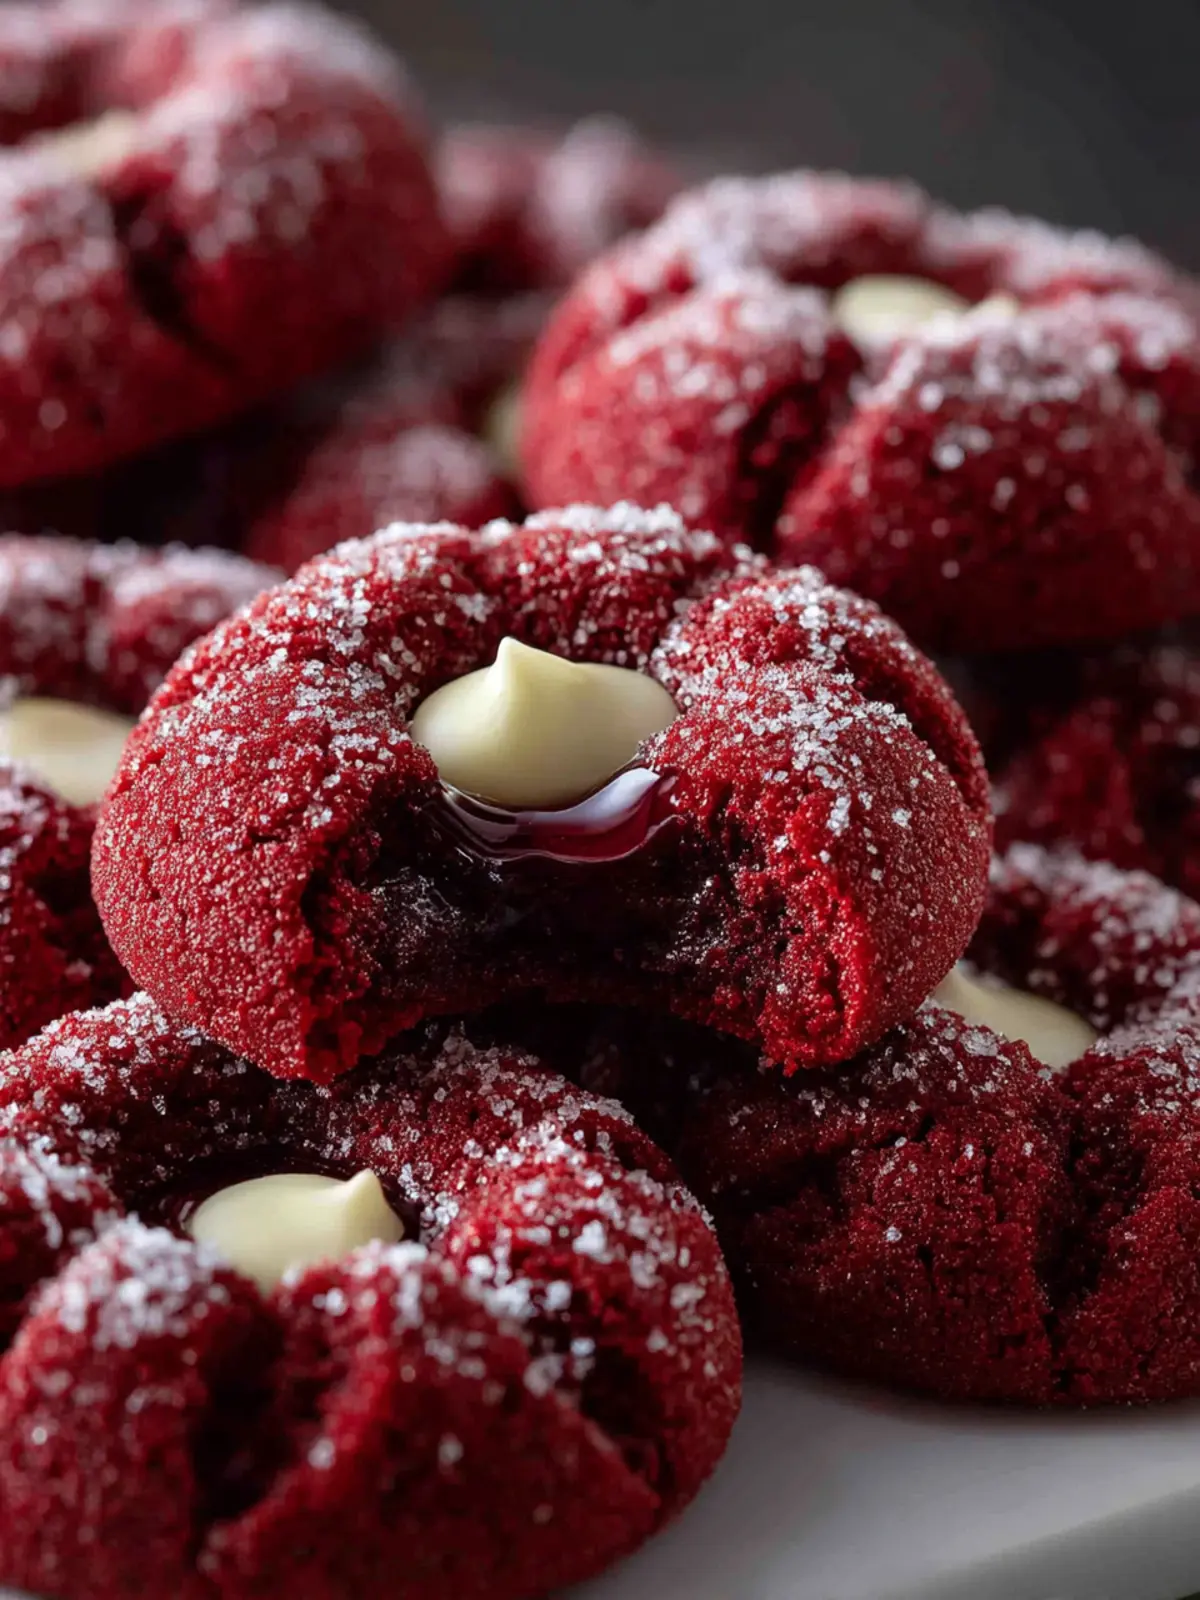
Red Velvet Thumbprint Cookies: Indulgent Bliss in Every Bite
Introduction to Red Velvet Thumbprint Cookies
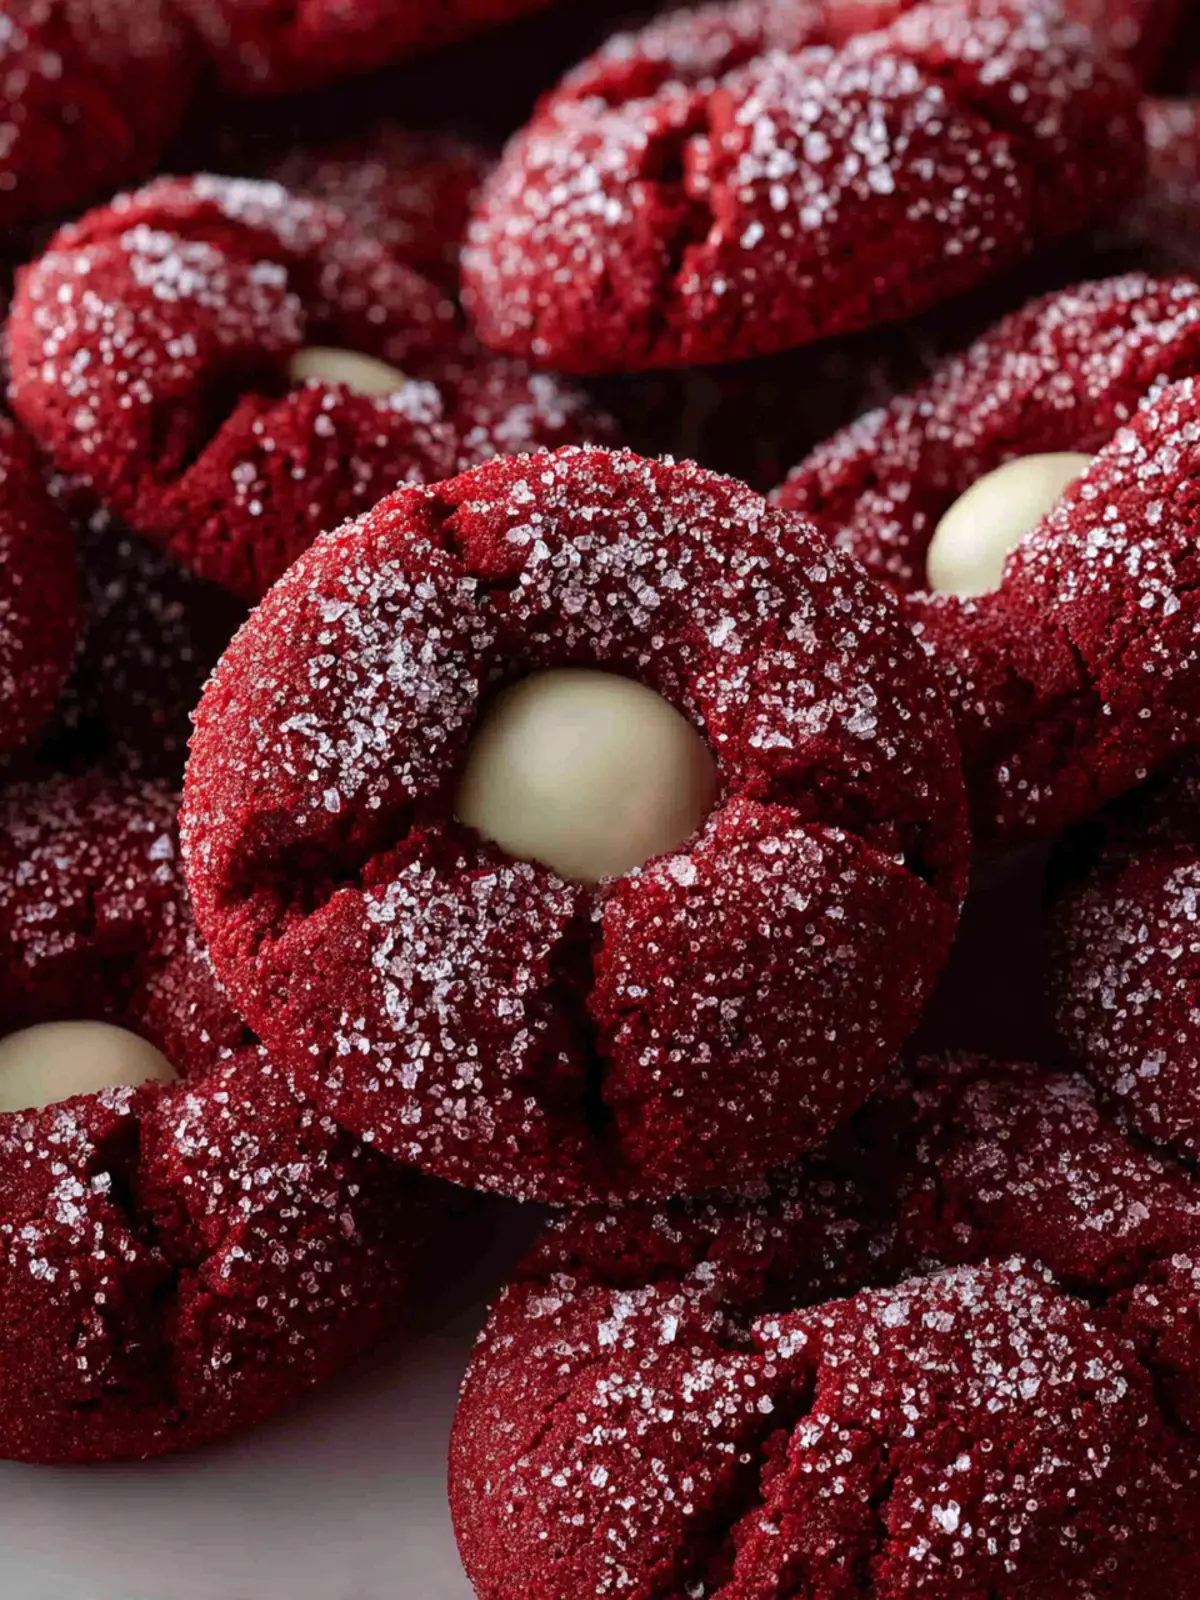
Imagine biting into a scrumptious cookie that merges the velvety richness of red velvet cake with the delightful surprise of a sweet filling nestled right in the center. Red velvet thumbprint cookies are not just your average cookie; they are a delightful twist that transforms a classic dessert into a beautiful, bite-sized treat. These cookies come with a striking color that brings a festive flair, making them perfect for celebrations or simply an indulgent snack at home.
What makes these cookies truly special is how they captivate the senses. The rich red hue is visually striking, while the soft, buttery texture provides a satisfying bite. Paired with a luscious filling—think cream cheese frosting or jam—each cookie becomes a delightful explosion of flavors that leave a lasting impression on anyone fortunate enough to try them. Whether you are preparing for a holiday gathering or looking for a unique dessert to impress your friends, these cookies are sure to shine.
Not only do red velvet thumbprint cookies taste incredible, but they also offer an enjoyable baking experience. There’s something wonderfully therapeutic about rolling the dough into little balls and creating those perfect thumbprint indentations. Plus, it’s a fantastic way to get creative in the kitchen. You can experiment with various fillings, whether you prefer a classic cream cheese frosting or something more adventurous like fruit preserves.
Baking these cookies can also become a cherished tradition. How about gathering your friends for a fun afternoon where everyone can share their favorite fillings and toppings? Or perhaps you might want to make them as a surprise for a loved one. The personal touch of homemade treats always means so much more.
In short, there’s no denying that red velvet thumbprint cookies are a must-try. With their captivating appearance, delightful taste, and versatility, they make for an exciting addition to any dessert spread. Let’s dive into the ingredients and see what makes these cookies truly extraordinary!
Key Ingredients for Red Velvet Thumbprint Cookies
Creating delicious red velvet thumbprint cookies starts with the right ingredients, each playing a unique role in contributing to the overall flavor and texture.
Butter: I typically use unsalted butter for these cookies, as it allows for precise control over the saltiness. The butter is creamed with sugar to create a light and fluffy base that gives the cookies their melt-in-your-mouth quality.
Sugar: Granulated sugar is key for sweetness, while brown sugar lends a hint of moisture and depth. This combination ensures that the cookies have the perfect balance of sweetness and a slightly chewy texture.
Eggs: One large egg is crucial for binding the ingredients together. It adds richness and ensures that the cookies hold their shape while baking.
Cocoa Powder: High-quality unsweetened cocoa powder is a must. It provides that characteristic red velvet flavor and color without adding excessive sweetness.
Flour: All-purpose flour is the foundation of the cookie dough. If you’re looking for gluten-free options, a gluten-free flour blend works as a fantastic substitute.
Red Food Coloring: This ingredient is essential for a classic red velvet look. Feel free to adjust the amount according to your desired intensity.
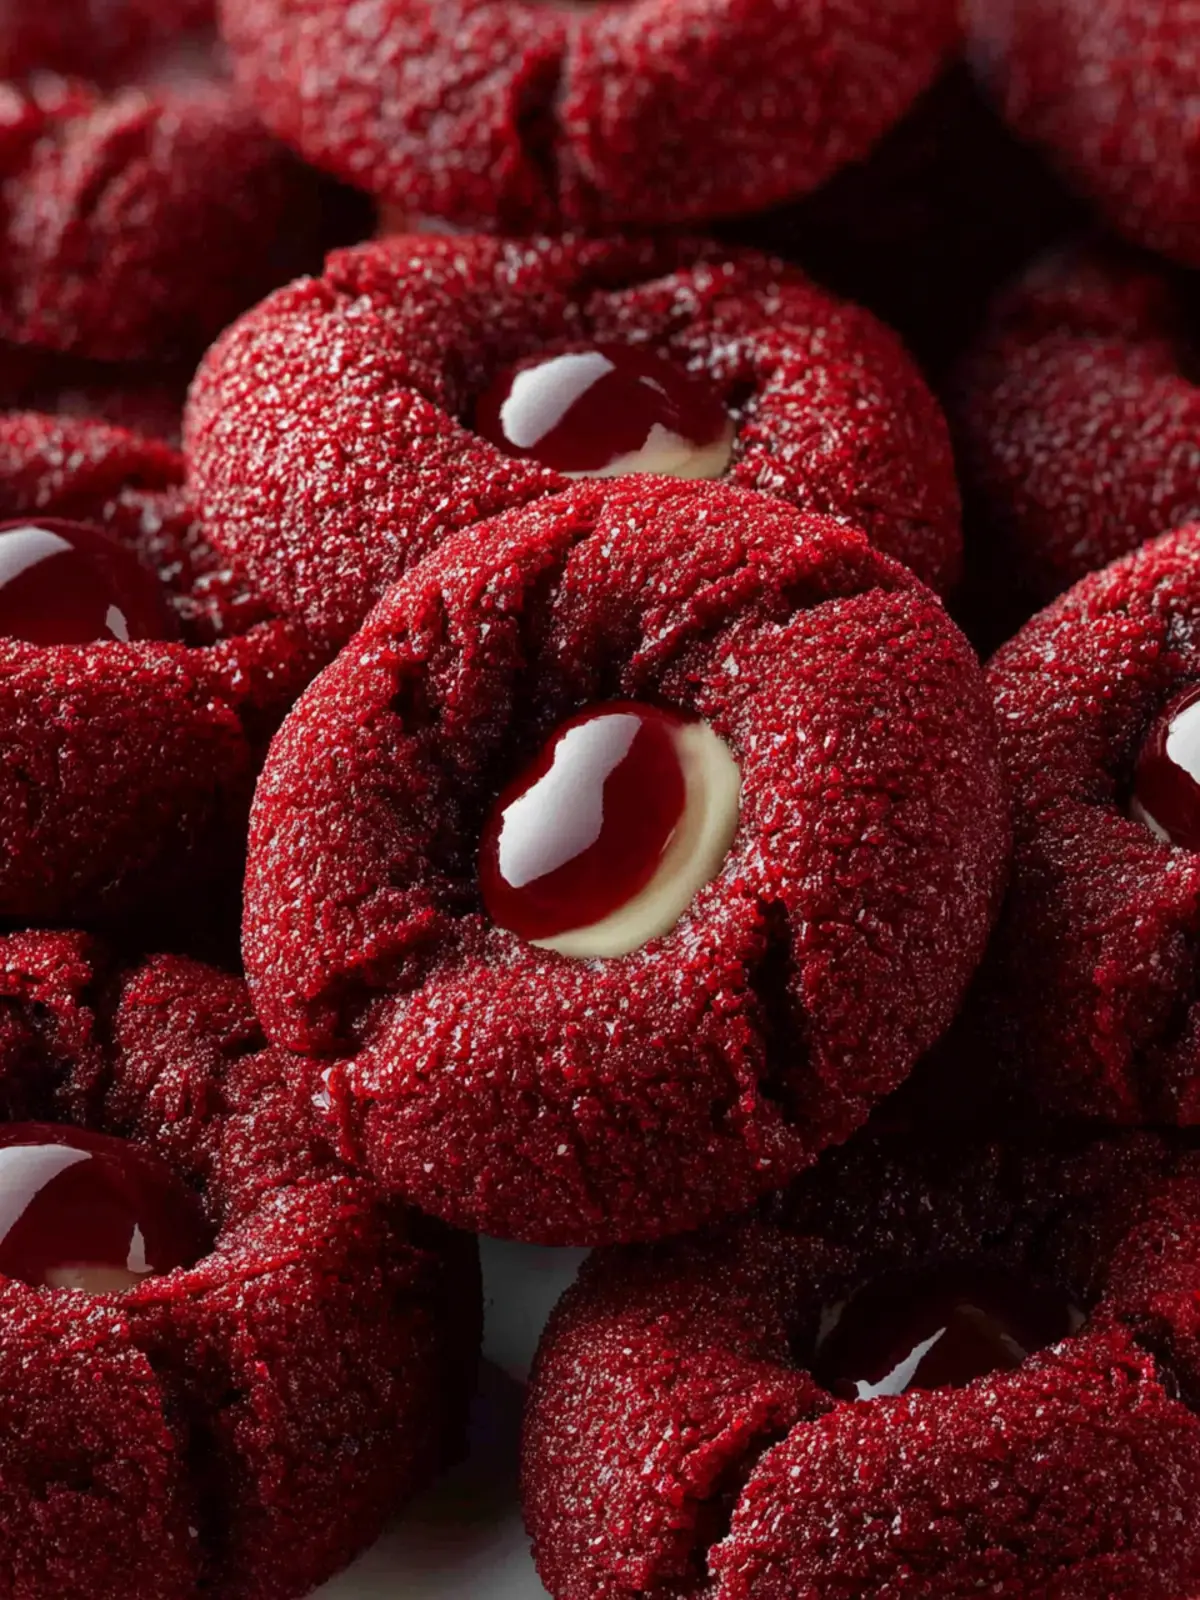
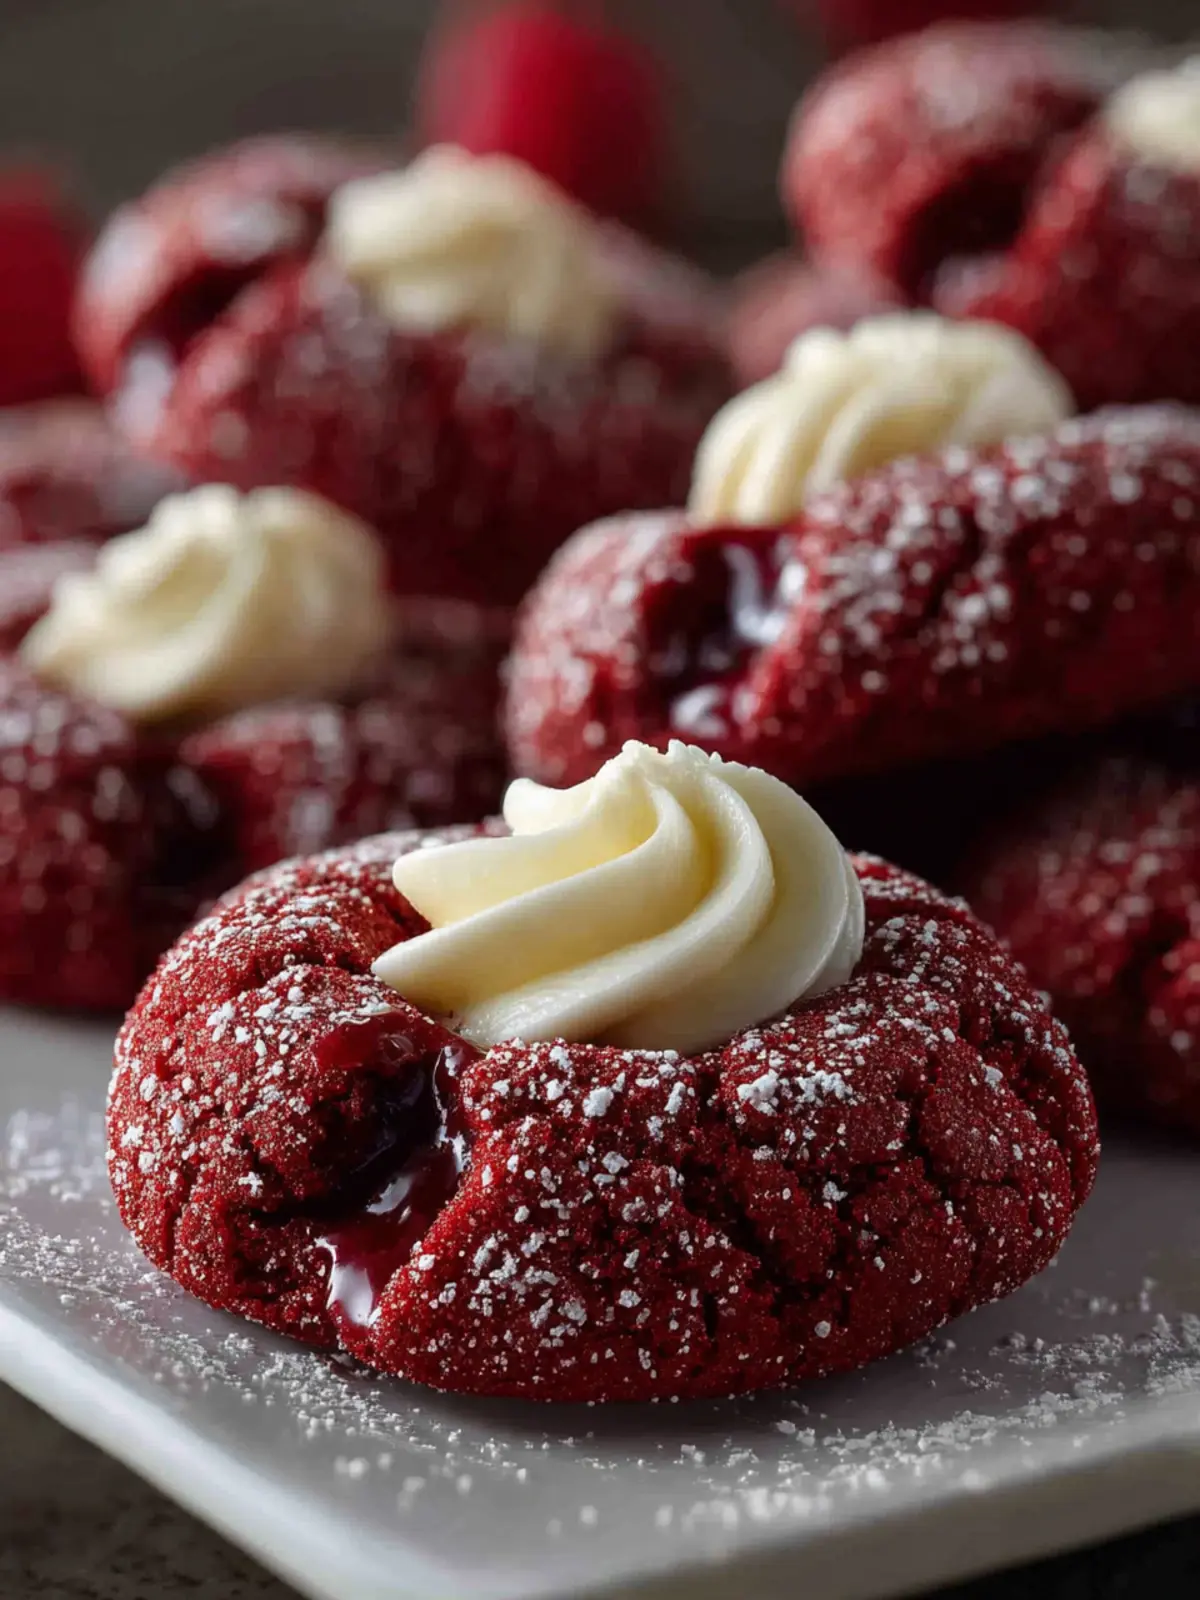
Jam or Preserves: A dollop of your favorite jam or preserves goes into the thumbprint, providing a sweet surprise with each bite. Raspberry or strawberry jam works beautifully!
In crafting these cookies, each of these ingredients plays a vital role in achieving the perfect red velvet thumbprint cookie experience that delights both the eyes and the taste buds.
Why You’ll Love These Cookies
Indulging in red velvet thumbprint cookies isn’t just about savoring a delightful treat; it’s an experience that brings a little luxury into everyday life. Picture this: a deliciously rich cookie, soft in the center, with a vibrant red hue that instantly catches the eye. These cookies not only look incredible, but they also boast a subtle chocolate flavor complemented by a sweet, gooey filling—making them a delightful nod to the classic red velvet cake.
A Perfect Balance of Textures
The harmonious combination of tenderness and a soft, creamy filling creates a symphony of textures in each bite. You’ll appreciate the way the outer edge lightly crumbles as you take a bite, revealing that delicious surprise within.
Great for Any Occasion
Whether you’re planning an elaborate gathering or simply enjoying a quiet evening at home, these cookies fit right in. They’re impressive enough for a special occasion yet easy enough to whip up on a whim, making them versatile favorites among friends and family.
Fun and Creative Filling Options
Another reason to love these cookies? You can customize the filling to match any mood or theme. From classic raspberry jam to decadent chocolate ganache, the possibilities are as endless as your creativity.
So go ahead, treat yourself! With red velvet thumbprint cookies, every bite becomes a celebration.
Tips for Making Perfect Red Velvet Thumbprint Cookies
There’s something undeniably charming about red velvet thumbprint cookies — they’re not just visually stunning; they also deliver a delightful flavor experience. To ensure you achieve cookie perfection, here are some friendly tips to guide you.
Quality Ingredients Matter
Use high-quality ingredients for the best results. I recommend opting for unsweetened cocoa powder and vibrant red food coloring to enhance the cookie’s flavor and appearance. Fresh ingredients guarantee a fresher taste and texture.
Don’t Skip the Chill
A common mistake is skipping the chilling step. Allowing the dough to rest in the refrigerator for at least 30 minutes helps the cookies maintain their shape and prevents them from spreading too much while baking. It’s worth the wait!
Perfect Your Thumbprint
When creating the thumbprint, use your thumb (or the back of a measuring spoon) to create a deep enough indentation. This ensures that there’s enough space to hold the filling, whether it’s cream cheese frosting or your favorite jam.
Even Baking Is Key
Rotate your baking sheet halfway through baking for uniform cookie doneness. The last thing you want is half your cookies perfectly baked while the others are a bit doughy.
Experiment with Fillings
While classic cream cheese filling is a crowd-pleaser, don’t hesitate to get creative! Try using fruit preserves or even a rich chocolate ganache for a little twist.
By incorporating these tips into your baking process, you can create stunning and delicious red velvet thumbprint cookies that will surely impress your friends and family!
Time Breakdown for Red Velvet Thumbprint Cookies
Making red velvet thumbprint cookies can quickly become a cherished part of your baking repertoire, especially when you see how easily the process unfolds. Here’s a clear timeline to navigate your cookie-making journey.
Preparation Time
Set aside about 20 minutes to gather your ingredients and prepare the dough. This includes mixing everything together and forming the cookie balls.
Baking Time
You’ll need around 12-15 minutes for baking. Keep an eye on your cookies for that perfect slight crispiness on the outside while remaining chewy on the inside.
Total Time
In total, expect to spend approximately 35-40 minutes from start to finish. With these decadent cookies, that time will feel like a sweet investment!
Nutritional Facts for Red Velvet Thumbprint Cookies
When you indulge in red velvet thumbprint cookies, it’s not just about flavor; it’s also essential to know their nutritional value. These delightful treats, with their vibrant color and rich taste, can be enjoyed in moderation.
Calories
A single red velvet thumbprint cookie contains about 120 calories. While they can be a tempting sweet treat, being mindful of your portion size will help you enjoy them without guilt.
Protein
Each cookie packs around 2 grams of protein, making them a tasty dessert that contributes a bit of fuel to your day. Pairing them with a glass of milk could enhance this aspect while making the experience even more enjoyable.
Sugar
With approximately 10 grams of sugar per cookie, these red velvet thumbprint cookies can satisfy your sweet tooth. Just remember to balance them with healthier options throughout your day, ensuring you maintain that sweet but healthy lifestyle!
FAQs about Red Velvet Thumbprint Cookies
As you savor each bite of your delicious Red Velvet Thumbprint Cookies, it’s entirely natural to have a few questions about these enchanting treats. Let’s dig into some frequently asked questions that can elevate your baking experience and put your mind at ease.
Can I make these cookies gluten-free?
Absolutely! Making red velvet thumbprint cookies gluten-free is easier than you might think. Simply swap out the all-purpose flour for a gluten-free all-purpose blend. Brands like Bob’s Red Mill or King Arthur Flour offer great options that yield similar textures and flavors. Just be sure to check that your other ingredients, like baking powder, are also gluten-free to avoid cross-contamination.
How should I store leftover cookies?
To keep your red velvet thumbprint cookies fresh and mouth-watering, store them in an airtight container at room temperature. They should last for about 3 to 5 days. If you want to preserve that delightful texture longer, consider placing parchment paper between layers of cookies to prevent them from sticking together.
Can I freeze Red Velvet Thumbprint Cookies?
Certainly! Freezing is a fantastic option if you want to save some red velvet thumbprint cookies for later. Allow the cookies to cool completely, then place them in a single layer in a freezer-safe airtight container or a resealable freezer bag. They can be frozen for up to three months. When you’re ready to enjoy, simply thaw them at room temperature or pop them in the microwave for a few seconds for that ‘fresh-out-of-the-oven’ warmth.
Don’t hesitate to dive into your baking adventure—each question you have helps create the perfect cookie experience!
Conclusion on Red Velvet Thumbprint Cookies
In the realm of indulgent treats, red velvet thumbprint cookies stand out not just for their stunning color but also for their delightful taste. These cookies are a perfect balance of rich, chocolatey goodness and a soft, buttery texture with a creamy filling that beckons you to take another bite. Whether you’re sharing them at a celebration or savoring them with your afternoon coffee, these cookies offer a unique twist to the classic thumbprint style. As you whip up this recipe, remember the joy they bring not only in taste but in the memories created while enjoying them with loved ones. Embrace the magic of baking with family and friends, and savor every moment!
Print
Red Velvet Cookies with Cream Cheese Filling
- Total Time: 55 minutes
- Yield: 24 cookies 1x
- Diet: Vegetarian
Description
Delicious red velvet cookies filled with creamy frosting that melt in your mouth!
Ingredients
Scale
- 2 1/4 cups all-purpose flour
- 1/4 cup unsweetened cocoa powder
- 1 tsp baking soda
- 1/2 tsp salt
- 1 cup unsalted butter (softened)
- 1 1/2 cups granulated sugar
- 2 large eggs (room temperature)
- 1 tsp vanilla extract
- 2 tbsp red food coloring
- 1/2 cup buttermilk
- 1/2 cup granulated sugar (for rolling)
- 8 oz cream cheese (softened)
- 1/2 cup unsalted butter (softened)
- 4 cups powdered sugar (sifted)
- 1 tsp vanilla extract
Instructions
- Whisk flour, cocoa powder, baking soda, and salt in a medium bowl. Set aside.
- Cream butter and granulated sugar until light and fluffy, about 2–3 minutes.
- Add eggs one at a time, mixing well. Stir in vanilla extract and red food coloring.
- Alternate adding dry ingredients and buttermilk, beginning and ending with dry ingredients. Mix just until combined.
- Cover dough and refrigerate for at least 30 minutes.
- Preheat oven to 375°F (190°C) and line baking sheets with parchment paper.
- Scoop dough into rounded tablespoons, roll into balls, then roll in granulated sugar.
- Place cookies 2 inches apart and gently press a thumbprint into the center of each.
- Bake for 8–10 minutes until edges are set but centers remain soft.
- Cool cookies completely on a wire rack.
- Beat cream cheese and butter until smooth. Gradually add powdered sugar, then vanilla, mixing until fluffy.
- Pipe or spoon cream cheese filling into cooled cookie centers.
Notes
- For best results, ensure the butter is softened at room temperature.
- Chilling the dough helps the cookies hold their shape while baking.
- Store leftovers in an airtight container in the refrigerator.
- Prep Time: 15 minutes
- Cook Time: 10 minutes
- Category: Dessert
- Method: Baking
- Cuisine: American
Nutrition
- Serving Size: 1 cookie
- Calories: 180
- Sugar: 12g
- Sodium: 150mg
- Fat: 8g
- Saturated Fat: 5g
- Unsaturated Fat: 2g
- Trans Fat: 0g
- Carbohydrates: 24g
- Fiber: 0g
- Protein: 2g
- Cholesterol: 30mg